Pulling Spoons
A while back I shared how I made spoons from a mold. I still have the plaster molds, but after awhile, I found them to be clumsy and frustrating. I’m not patient enough to wait for the mold to release the wet clay. So over the past few days being cooped up inside do to nasty weather, I’ve started back at spoon making without the molds. Instead of pressing clay into a mold, I roll a wedge-shaped coil, press the thicker end around the bowl of an existing spoon and pull the handle. My process is changing and evolving, but these are my basic steps for pulling ceramic spoons.
Select a spoon from the kitchen with a bowl shape you want to achieve or use as a starting point. Also grab any texture you may want to add and a pony roller (this one is similar to mine: Norpro Deluxe Pastry and Pizza Roller ). If you plan on having a hole, get your hole punch. I have this hole punch set: Jack Richeson 4-Piece Clay Hole Cutters
Roll a small clay coil with a bulbous end, with enough volume to press around the end of the selected spoon.
Press the bowl of the spoon into the bulbous end and evenly shape the clay around the bowl paying attention to any cracks that might be forming and smooth those out.
By either holding the clay spoon by the bowl (“real” spoon still attached) or laying it on the work space, narrowing the handle by gently pulling and shaping being careful not to stress where the handle connects to the bowl. I do about half the pulling with the spoon attached and half later while supported on the work space. You can support the “neck” with one hand to keep it from pulling.

The trickiest part by far is releasing the clay from the bowl of the “real” spoon. If you have a slick metal spoon, a little water will allow you rotate and slowly pull it out if you make sure you limit stretching the clay bowl. If you used a wooden spoon, this may not work.
The bowl and stem are then cleaned up to remove cracks and get the thickness I want. If the clay ball on the end was much larger than the “real” spoon’s bowl, I will continue to shape the bowl as I would a pinch pot.
Use your texture and a pony roller to gently press in the texture. I like to wrap lace just barely around the sides.
Punch the hole and clean it up.
As the clay firms, clean up the bowl and rim to get the shape you want.
I let mine dry imprint and rim side down and give a final few smoothings to the handle and slim the neck a tiny bit more.
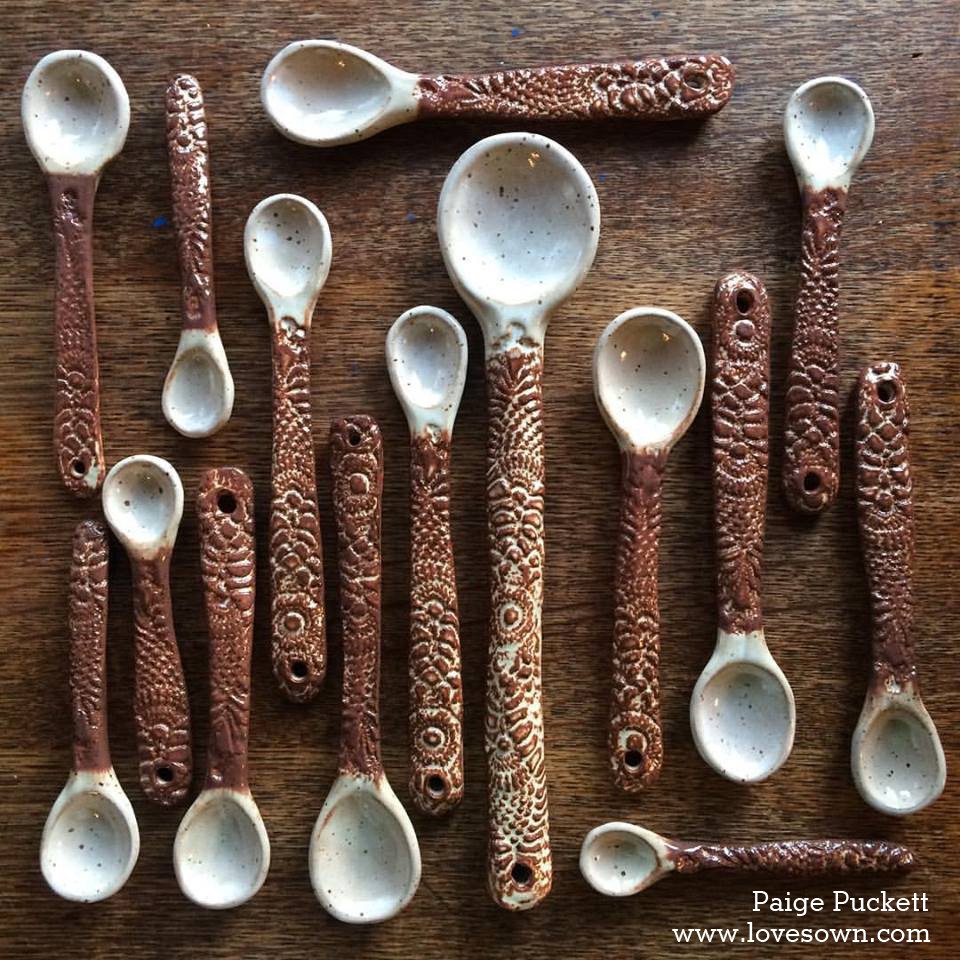
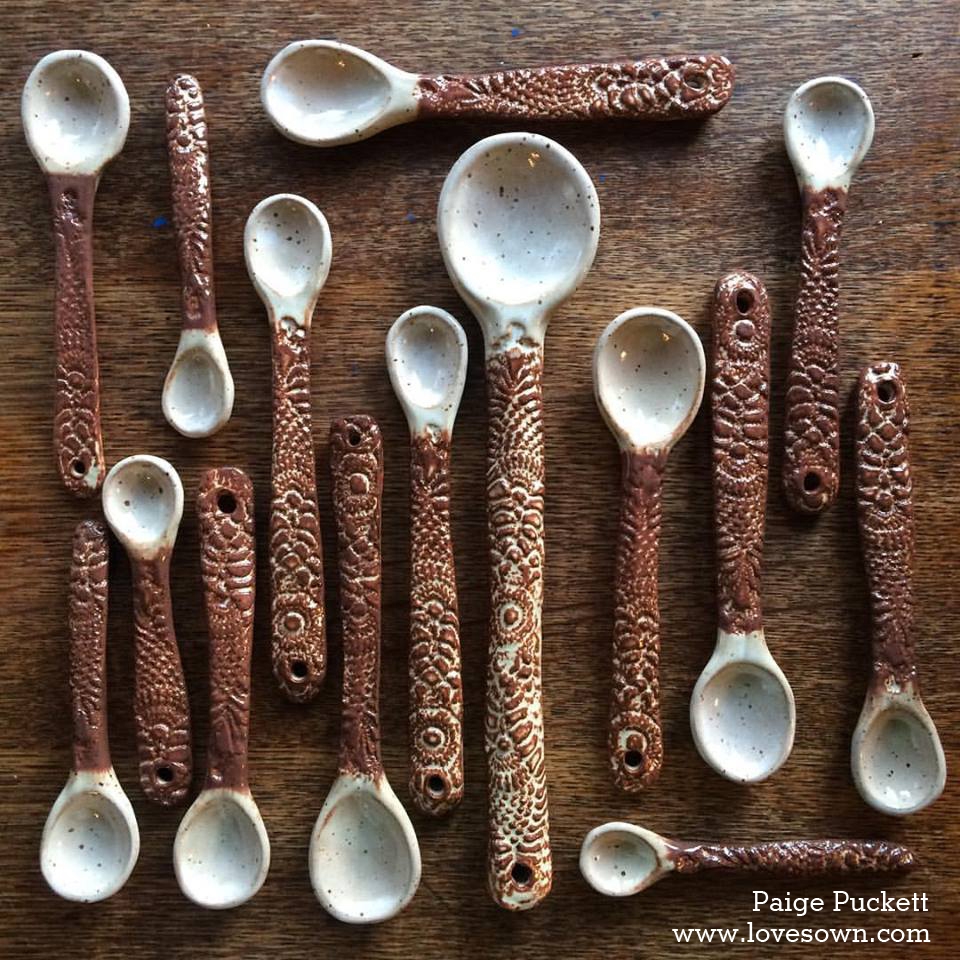
So there are all the pulled spoons drying on the kiln shelves ahead of bisque firing. I think they may turn out stronger than the molded ones as they began with a fresh, solid ball of clay where air was not introduced in the process.
And here is the finished product in a Faux Shino and white glaze:
This post contains affiliate links. Purchases made through my affiliate links give me a small commission to help run this blog, but don’t cost you any extra.


19 Comments
sddonlon
Wonderful!!! Gotta try! Thank you!
Paige Puckett
Have fun!
Lori Buff
Thanks for the tutorial. Now another kitchen tool will be relocated to the pottery studio.
Paige Puckett
Yes, our poor kitchen tools :).
Priska
Wie glasiere ich die Löffel rundum?
Paige Puckett
If you are asking how to keep them from sticking to the kiln shelves, then kiln stilts are what you need. Kiln stilts are ceramic props with just metal pins as a point of contact with the glazed piece. They can be straight lines or tripods of different sizes. The pins will leave a surface mark that can be buffed down to make it smooth. Here is an example on Amazon: https://amzn.to/49csnmp
Silly Little Sheep
Rolling on lace is such a great idea!
Helen
This was great, I will definitely give it a try. I have made spoons in the past with various success rates.
How do you fire the spoons when they are glazed? Do you suspend them on wire from their hole, or fire them flat?
Thanks for your time.
Paige Puckett
I use kiln stilt pins.
Here’s an example: https://www.amazon.com/gp/product/B07TJ2M323/ref=as_li_tl?ie=UTF8&camp=1789&creative=9325&creativeASIN=B07TJ2M323&linkCode=as2&tag=lovsow-20&linkId=f3af88d7320498dc7ac30df0894220d2
You rest the spoons on the pins and then buff out the marks after they are fired.
Nancy Lewis
Nancy Lewis
What a great idea! I can definitely see my ceramic students creating these spoons. I especially like how you added the hole, so the spoons can be displayed, and the glazes that you choose have a nice contrast.
Dianne Riley
Thank you! Your tutorial is so easy to follow. I’m anxious try making my first spoon!
Jenniferlynne
Beautiful spoons~!! Do you glaze the backs of them? I tried making spoons for christmas gifts, but the glaze was ruined from the stilts…just curious how you do it…THANKS FOR SHARING~!! :^)
Paige Puckett
Thanks! I glaze the whole spoon and buff out the sharp spots from the stilts.
littledolce13
Oh my gosh, ROLLING lace on. I'm such an idiot! I got on a kick of wanting lace patterns on clay but couldn't find a method that worked or pieces survived. I figured it was my clay body(Cone 10 porcelain). I'm feeling inspired again and want to make another go at it.
Do you use the same type of clay for all your work? I think I read on another entry that you fire mostly to Cone 5/6? Have you noticed some clays/firing work better than others?
Thank you for sharing your awesome pieces!!
Paige Puckett
I alternate between Little Loafers and Speckled Brownstone from Highwater Clays. It's cone 5/6 and well behaved. The only trouble I've had of late is that the clear glaze I've never previously had trouble with has started bubbling. I'm wondering if the glaze has been contaminated or if I've somehow changed my bisque temp.
Guina
Do you have one available for purchase?
Aventure in Vietnam
Have you thought of using greasy substance before hand to release newly formed spoon from model Paige? I read about that potter using oil when working to form porcelaine flowers….
Paige Puckett
I have not tried that. It might be worth an attempt!
Andy Mueller
Great idea to design the spoons. Could you tell me how you glaze the spoons, or rather burn them in the oven.